Custom Auth
What is Custom Auth?
Custom Auth, an optional Now4real Premium feature, grants you complete control over user authentication and authorization.
By default, Now4real authenticates users via social login and email login. The first time a user tries to post a chat message, they are requested to sign in via Google, Facebook, X, LinkedIn, or email. Once signed in, the user identity is remembered across all the websites that use Now4real with social and email login. As an alternative, you can enable users to chat without authentication by allowing them to simply choose a nickname through the “No registration” option.
On the other hand, Custom Auth replaces social/email logins and the “No registration” option, enabling your system to authenticate users directly. This facilitates seamless single sign-on (SSO) implementation. With SSO, users who sign in to your website are automatically logged into the Now4real chat as well, exclusively for your site.
All Now4real chats and counters are publicly visible. However, if you require restricted visibility, Custom Auth’s authorization feature enables you to define specific visibility rules and restrict presence detection.
Authentication and single sign-on
It’s quite straightforward to implement single sign-on with Now4real. Your back-end and the Now4real back-end don’t need to talk to each other directly. In fact, they speak indirectly through signed tokens inserted into your HTML pages, based on the JWT standard.
Getting started with single sign-on
Let’s see a quick example of how to achieve SSO.
Turn on Custom Auth
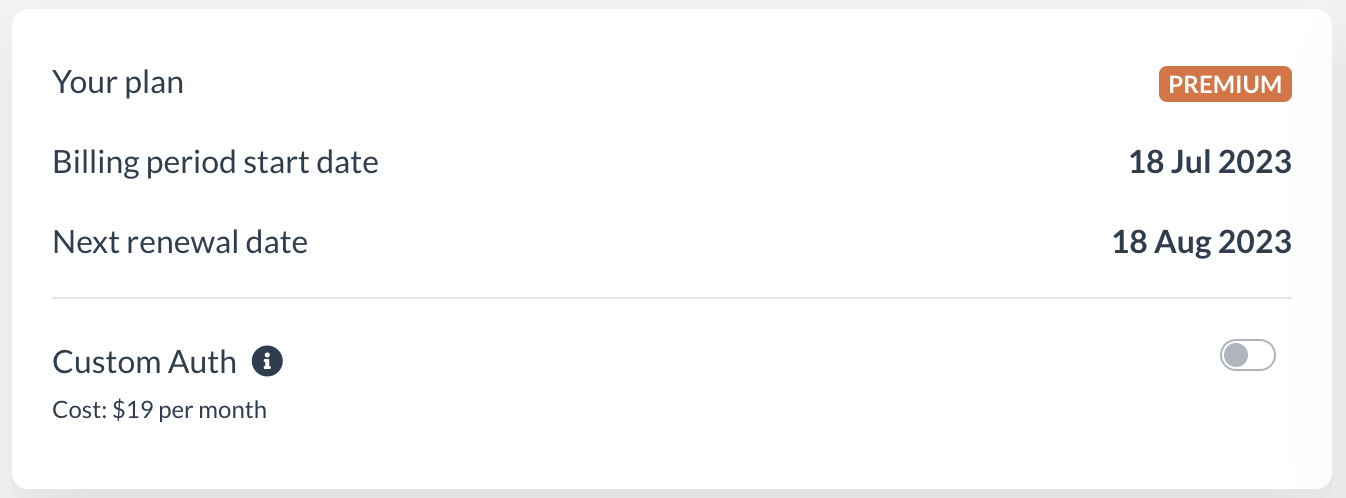
Open your Now4real Dashboard and make sure you are on a Premium or Enterprise plan.
Go to the Plan section and, if it’s not already enabled, click on the “Custom Auth” switch to enable Custom Auth (depending on your plan, you may be requested to accept the charge of the Custom Auth price or to contact us to enable the feature remotely).
 By enabling Custom Auth, you have the option to activate JWT authentication and manage the authorization settings for each of your sites. You still have the ability to utilize social login on some of them.
Turn on JWT authentication
Go to the Sites section, add your site, and verify it.
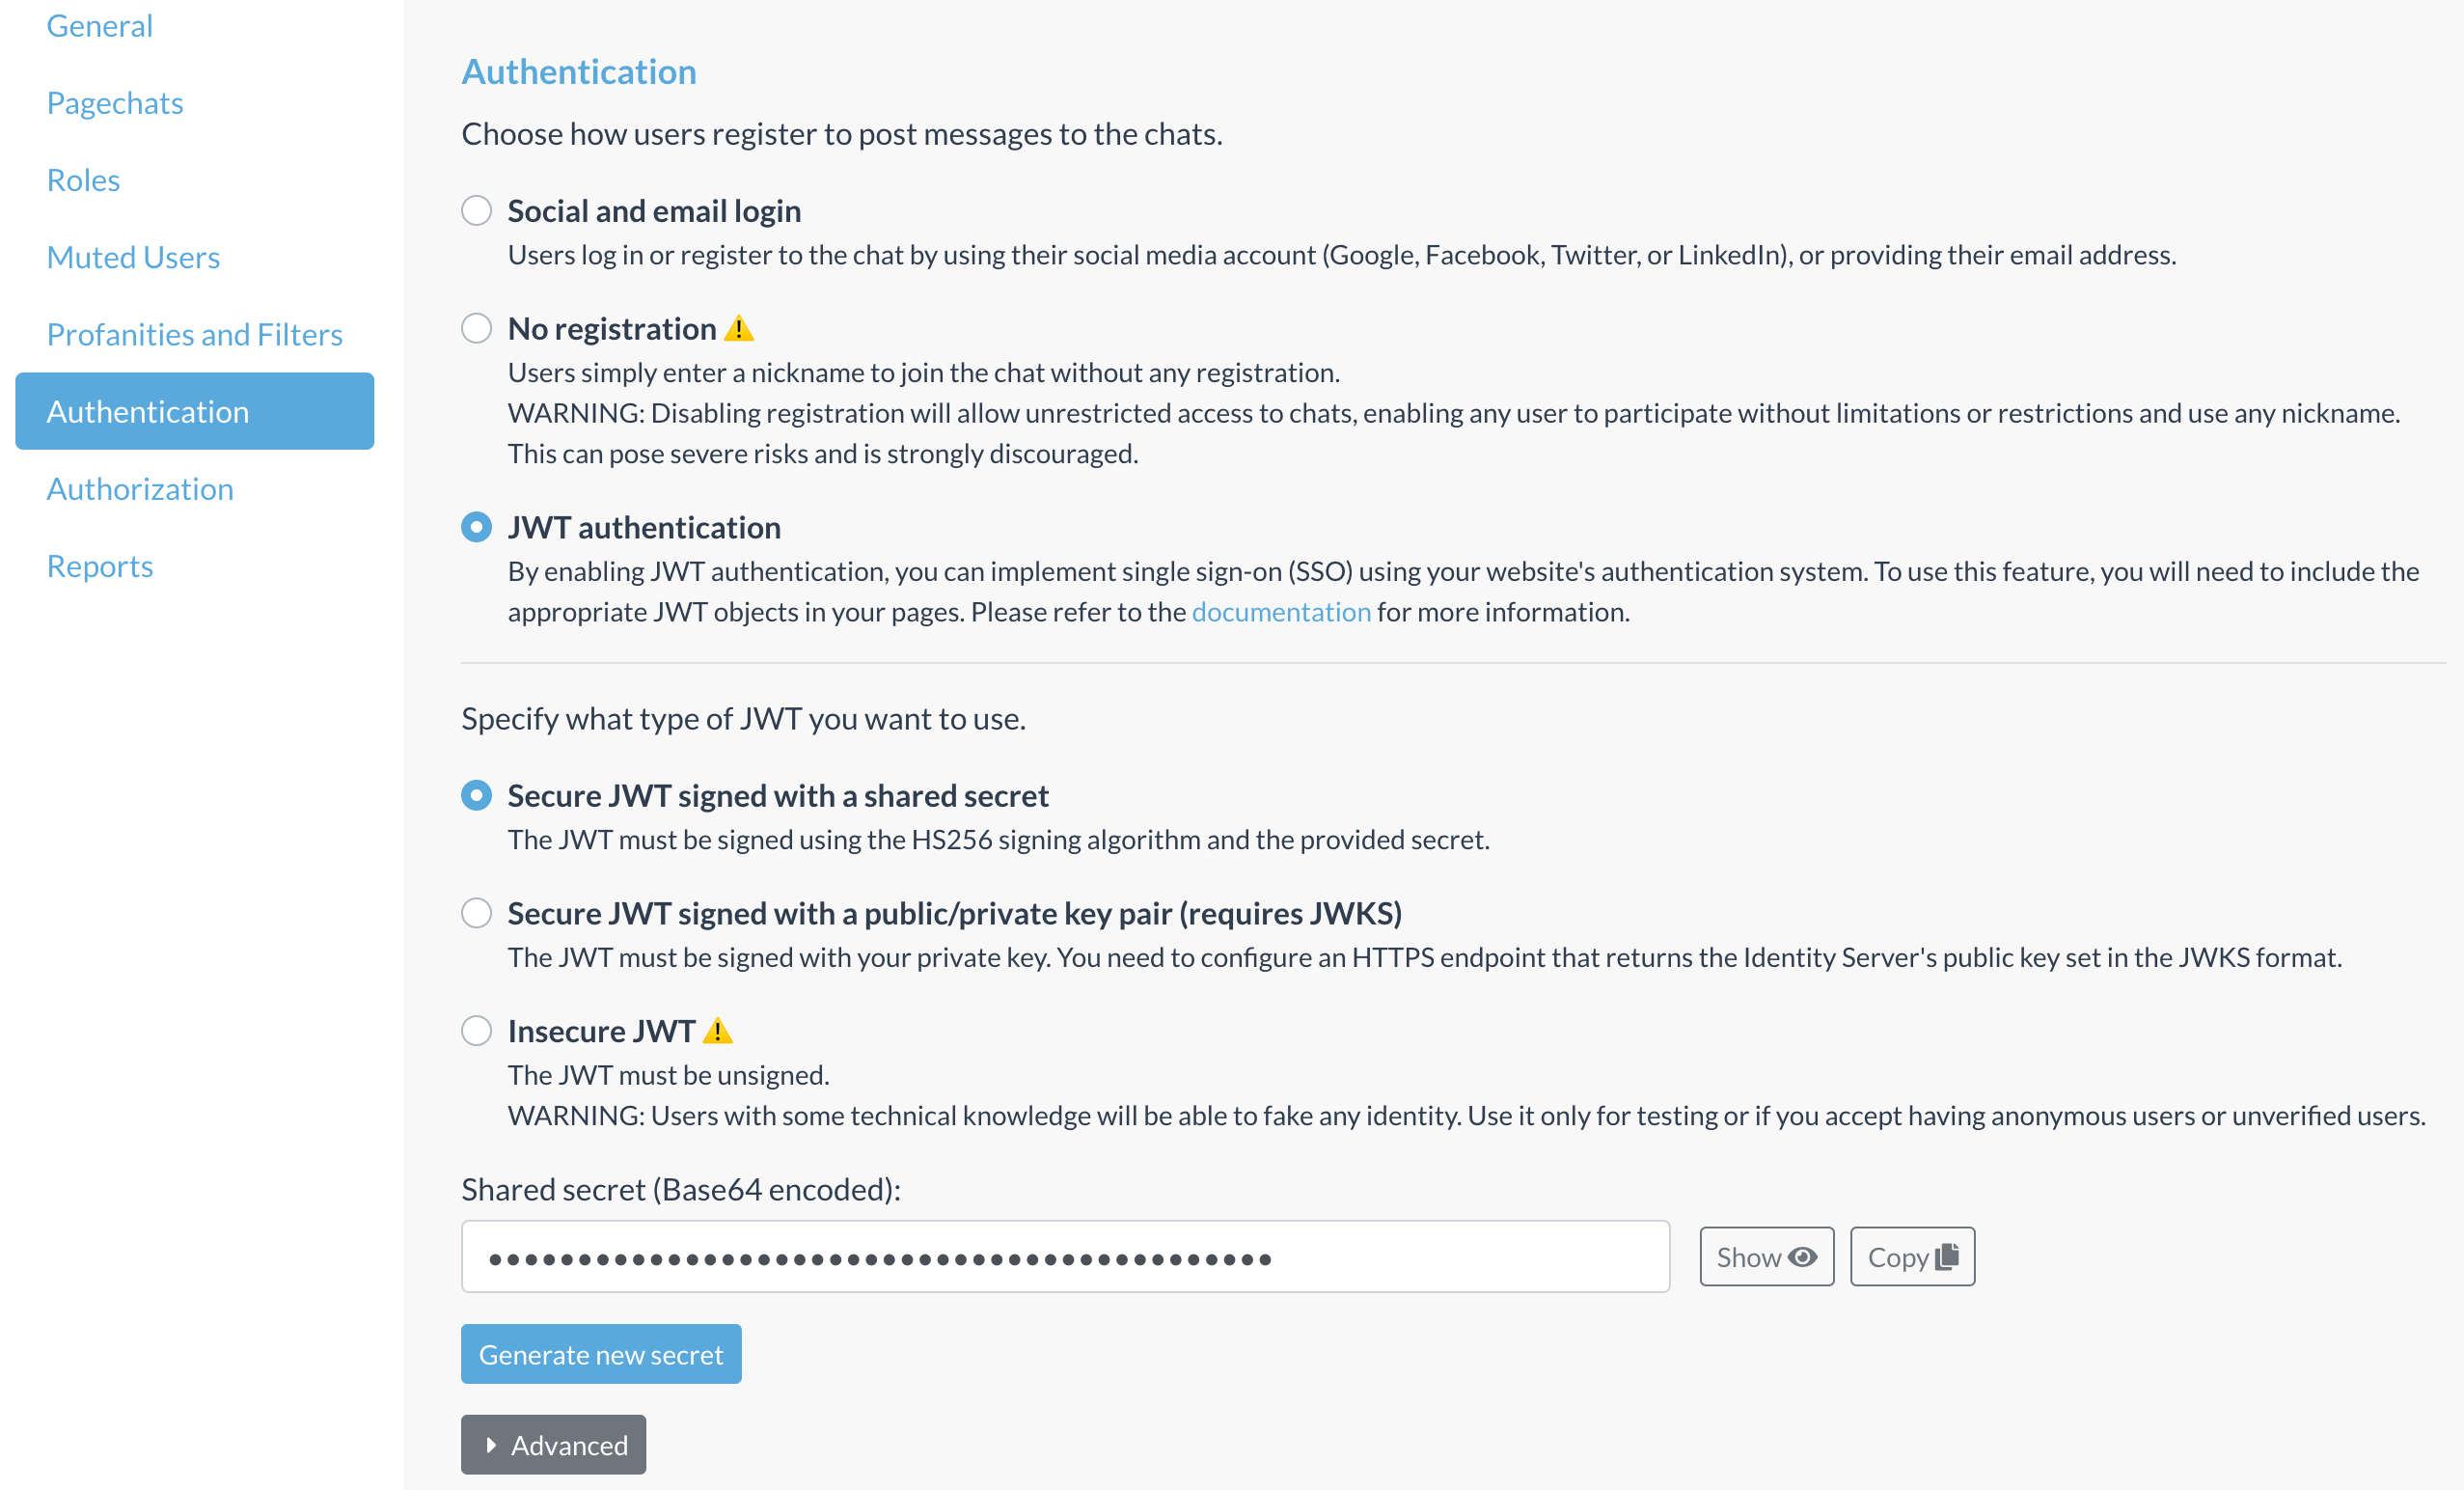
Open the Settings of that site and go to the “Authentication” tab. Click on the “JWT authentication” option to enable it. Social login will be disabled on that site.
 Now, you need to change the configuration of Now4real in your web pages to activate Custom Auth on the client side too. Just add custom_auth: { enabled: true } to your existing now4real.config object. For example:
<script type="text/javascript">
  window.now4real = window.now4real || {};
  now4real.config = {
    widget: {
      color_external_background: '#39AAE1', color_external_text: '#FFF',
      color_internal_background: '#39AAE1', color_internal_text: '#FFF',
      align: 'left'
    },
    scope: 'page',
    custom_auth: { enabled: true }
  };
  (function () { var n4r = document.createElement('script'); n4r.type = 'text/javascript'; n4r.async = true; n4r.src = 'https://cdn.now4real.com/now4real.js'; var s = document.getElementsByTagName('script')[0]; s.parentNode.insertBefore(n4r, s); })();
</script>
This way, the Now4real widget will connect anonymously, without prompting for social login. This means it will not be possible to post chat messages but only to view them. Presence detection and counter visibility will be unchanged.
Now, you need to insert a proper JWT token into your page to authenticate a user.
How does JWT work?
A JWT (JSON Web Token) is an object that contains the identity of the current user (basically, the display name and the picture). It’s used as part of a typical workflow like this:
-
- Your web server authenticates the user via your existing authentication mechanism.
- When your web server generates a page containing the Now4real code, it embeds a JWT token in it, containing that user’s identity. On the other hand, your JS code will need to retrieve the JWT token from your server if you serve static pages, perhaps via an XHR call.
- The Now4real code sends the JWT token to the Now4real server (managed by us because it’s a SaaS).
- The Now4real server reads the user identity from the JWT token and considers that user authenticated with that identity.
That’s all. The user will find themselves already authenticated on Now4real without doing anything.
But how can the Now4real server trust the JWT token it receives? Could anybody forge a fake JWT token? No worries… JWT tokens must be signed! In this example, we will consider the use of a shared secret key using the HS256 algorithm signature. However, as we will see later on, there is also the option to use a public/private key pair by configuring a JWKS (JSON Web Key Set). You can find your secret key in the Dashboard:
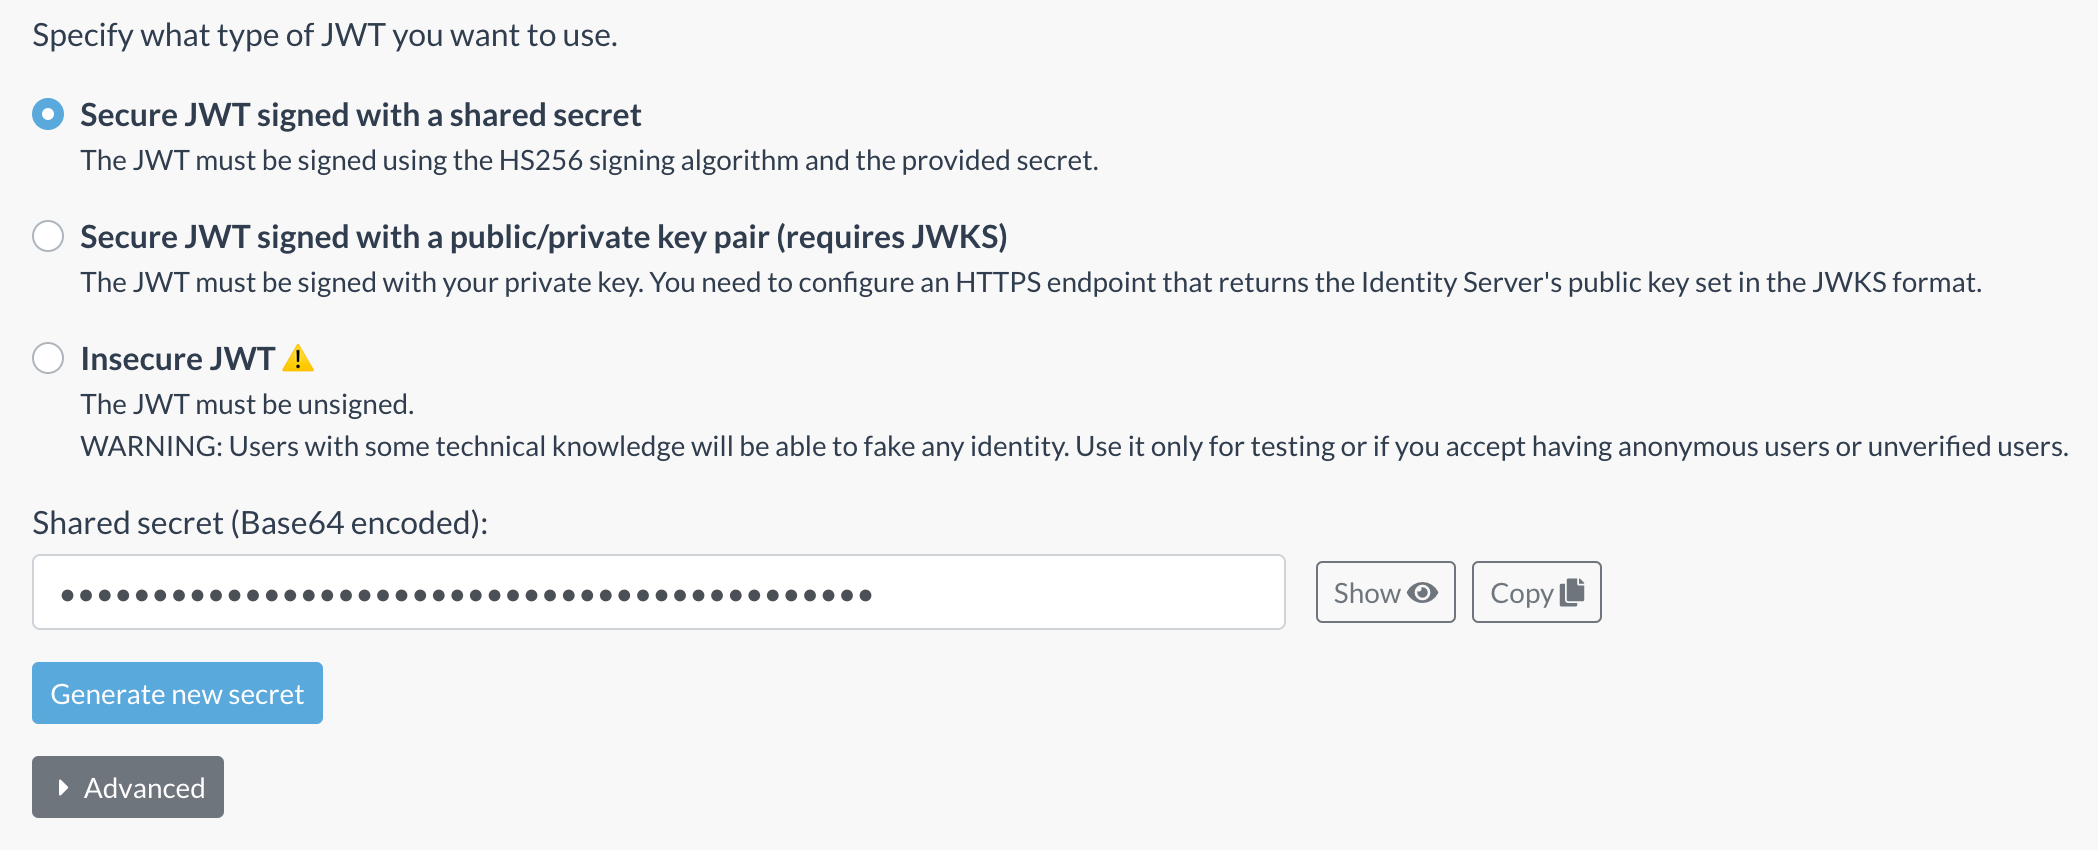
You can copy the secret from there, and you can generate a new secret at any time, in case you need to invalidate the current secret.
Generate your JWT token
JSON Web Tokens consist of three parts separated by dots (.), which are:
- Header
- Payload
- Signature
1) The header consists of two parts: the type of the token, which is JWT, and the signing algorithm being used.
For example:
{
   "alg": "HS256",
   "typ": "JWT"
}
Then, this JSON is Base64Url encoded (without padding) to form the first part of the JWT.
In the example above, it becomes:
eyJhbGciOiJIUzI1NiIsInR5cCI6IkpXVCJ9
2) The payload contains the claims, which are statements about the user and additional data.
For example:
{
   "sub": "user837127",
   "name": "Jack Park",
   "picture": "https://example.com/jackpark.png"
}
The claims shown in this example have these meanings:
- sub: a unique id attributed to that user by your platform.
- name: the name of the user that will be displayed in the chat.
- picture: the URL of the user’s picture that will be displayed in the chat (this is optional).
For the full list of claims available in Now4real, please refer to Now4real’s JWT Reference.
The payload is then Base64Url encoded (without padding) to form the second part of the JSON Web Token.
In the example above, it becomes:
eyJzdWIiOiJ1c2VyODM3MTI3IiwibmFtZSI6IkphY2sgUGFyayIsInBpY3R1cmUiOiJodHRwczovL2V4YW1wbGUuY29tL2phY2twYXJrLnBuZyJ9
3) The signature is created by taking the encoded header, the encoded payload and signing them with the secret and the signing algorithm specified in the header, like this:
HMACSHA256(
base64UrlEncode(header) + “.” + base64UrlEncode(payload),
base64Decode(secretB64))
Please pay attention that in the example above, secretB64 is passed through the Base64 decode algorithm and not Base64Url decode.
The resulting signature is then Base64Url encoded (without padding) to form the third part of the JSON Web Token.
Let’s apply this function to the example header and payload above, using this Base64-encoded secret obtained from the Dashboard: uYc8qUkJMagGsXnVugluULTiHiKE5b/VaYM0tVLCmJQ=
We obtain this signature:
CIrlJRW-6RBVxQ3jArGqeIwkf6xMSUp_4dRGOWFfd-I
Finally, we can put together the three elements and get the JWT:
eyJhbGciOiJIUzI1NiIsInR5cCI6IkpXVCJ9.eyJzdWIiOiJ1c2VyODM3MTI3IiwibmFtZSI6IkphY2sgUGFyayIsInBpY3R1cmUiOiJodHRwczovL2V4YW1wbGUuY29tL2phY2twYXJrLnBuZyJ9.CIrlJRW-6RBVxQ3jArGqeIwkf6xMSUp_4dRGOWFfd-I
You can play with JWT tokens at jwt.io, where a live debugger is available on the home page. On the same page, you can find a huge list of open-source libraries for many different languages that allow you to sign the tokens very easily.
Use your JWT token
After you have generated the JWT, you need to pass it to the Now4real client library through the custom_auth property that we added above. So, in your now4real.config object, you will add the jwt parameter inside custom_auth, leading to:
custom_auth: {
  enabled: true,
  jwt: 'eyJhbGciOiJIUzI1NiIsInR5cCI6IkpXVCJ9.eyJzdWIiOiJ1c2VyODM3MTI3IiwibmFtZSI6IkphY2sgUGFyayIsInBpY3R1cmUiOiJodHRwczovL2V4YW1wbGUuY29tL2phY2twYXJrLnBuZyJ9.CIrlJRW-6RBVxQ3jArGqeIwkf6xMSUp_4dRGOWFfd-I'
}
With this configuration, the Now4real chat will start up with the user already authenticate as “Jack Park” (userid: user837127).
Differently from social login, there is no memory kept by Now4real on user authentication status because Now4real expects to find the JWT passed to the script every time on all the pages that contain Now4real.
As we said above, the JWT value is generated on the server side (by your own server) and can be delivered to the web page in several ways:
- It can be directly embedded in the HTML page at page generation time. This is the typical scenario for dynamic sites based on any CMS (content management systems). For example, in the case of a WordPress site, you will have some PHP code that creates the JWT and inserts it into the page source generated for each user. Pay attention to page caching in these cases since the generated page must be different for every authenticated user.
- It can be retrieved by your JavaScript code running on the page via an XHR call to your server before creating the now4real.config object and loading the Now4real script. This is the typical scenario for static sites and single-page applications.
- It can be written in a cookie at the time of initial authentication and then retrieved by the page before creating the now4real.config object and loading the Now4real script.
JWKS
As mentioned earlier, there is the possibility to sign the JWT token using a public/private key pair. In this case, the signing is done using your private key, and the Now4real cloud will verify the signature through a set of public keys available in a dedicated HTTPS endpoint in the JWKS format.
To enable this signing method, you have to choose the “Secure JWT signed with a public/private key pair (requires JWKS)” option and configure a valid JWKS endopoint.
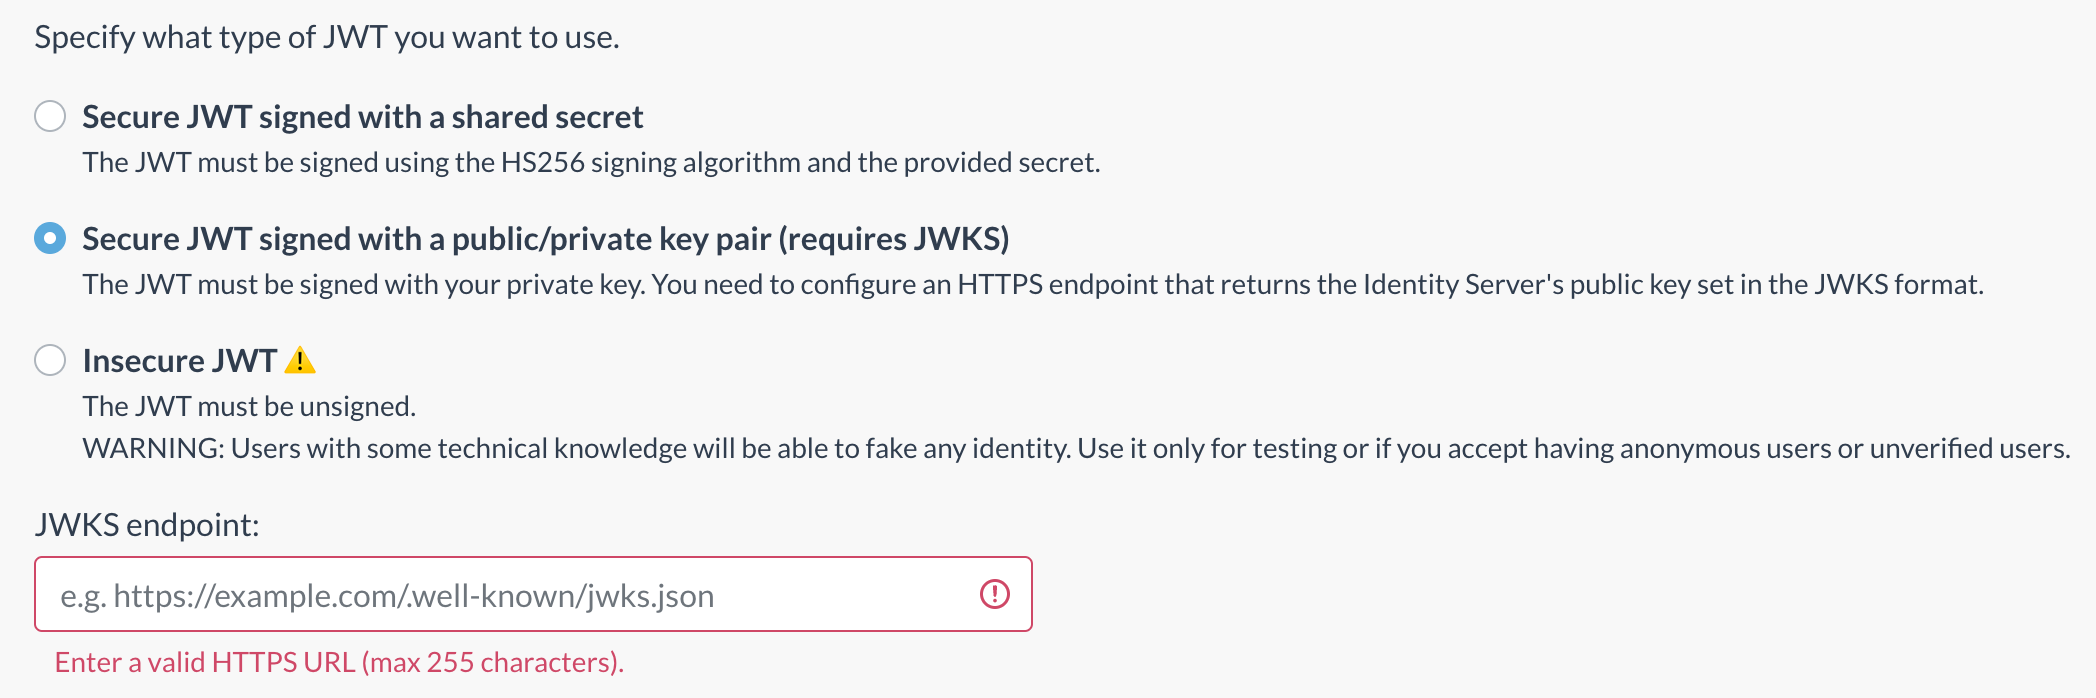 In relation to the guidelines for creating the JWT token, the previously mentioned rules remain in effect. The only notable difference is that the JWT token header must include “alg”: “RS256” instead of “alg”: “HS256”, and the JWT must be signed accordingly using the configured algorithm.
Unsecured authentication
Signing the JWT token, with a shared secret key or with a public/private key pair, is the only way to guarantee that the Publisher generated it and it was not forged or tampered by some other party. But there might be cases where you want to disable the signing part and accept unsecured authentication.
If you enable the “Insecure JWT” option in the Dashboard, you will be warned about the risks, and if you confirm, unsecured authentication will be active.
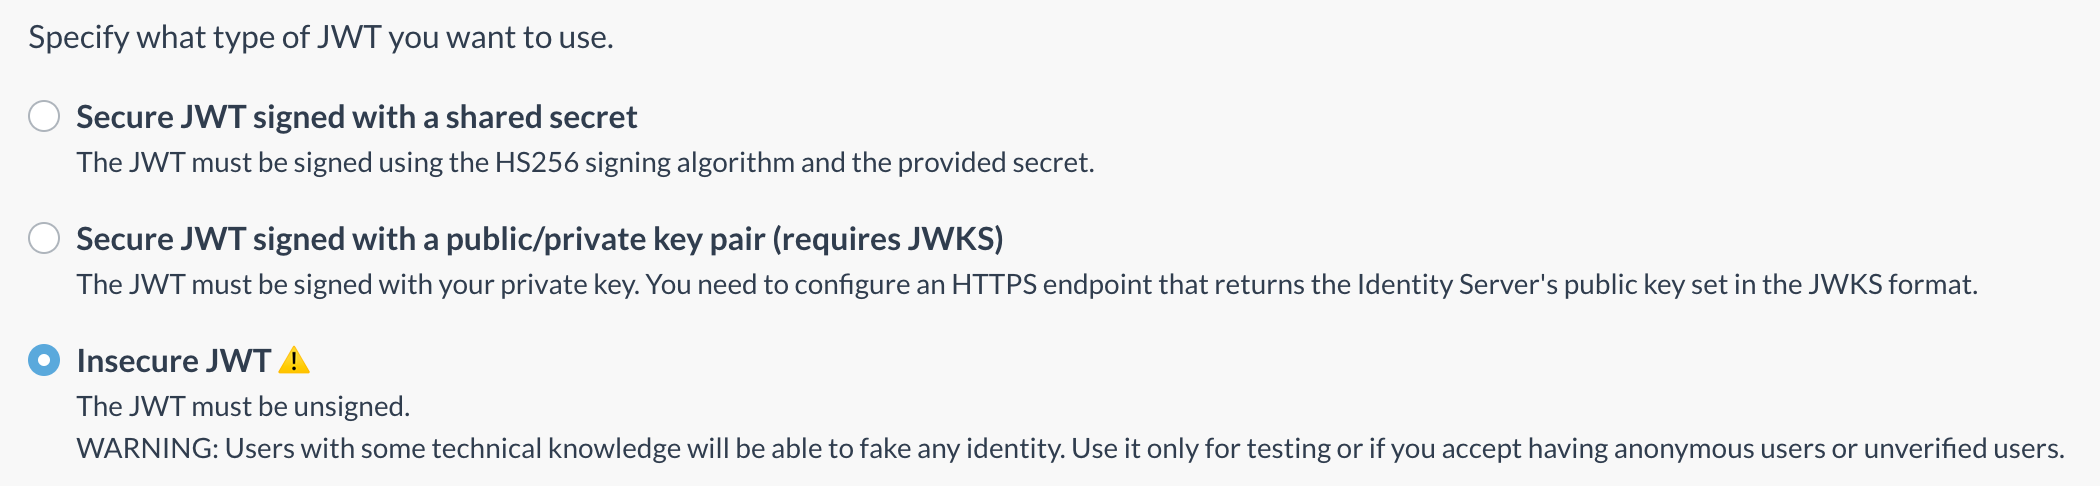 WARNING: By turning off secure authentication, the JWT token signature will not be verified. Users with some technical knowledge will be able to fake any identity. USE IT ONLY FOR TESTING OR IF YOU ACCEPT HAVING ANONYMOUS USERS OR UNVERIFIED USERS.
In the case of unsecured authentication, the JWT token will be a bit different (it’s actually called an “unsecured JWT” as per RFC specification):
- The JWT header contains “alg”: “none” instead of “alg”: “HS256”.
- The JWT signature is missing (but beware, the final dot is still present), leading to a JWT like this:
eyJhbGciOiJub25lIiwidHlwIjoiSldUIn0.eyJzdWIiOiJ1c2VyODM3MTI3IiwibmFtZSI6IkphY2sgUGFyayIsInBpY3R1cmUiOiJodHRwczovL2V4YW1wbGUuY29tL2phY2twYXJrLnBuZyJ9.
With unsecured authentication, JWT tokens can be generated directly on the client side because there is no need to keep a secret key on the server for signing. This can be useful for quick testing in non-critical environments.
There may be other scenarios where it is acceptable to define the user identity on the client side without any verification. For example, if the user is free to decide their own display name and picture without email or social validation. Or when anonymous chatting is acceptable.
In these cases, it’s straightforward to generate the JWT directly within the page. Below is a ready-to-use JavaScript code example with the utility functions needed to generate the JWT, already minified.
// jwt utils
function toBase64URL(e){var a=btoa(JSON.stringify(e));return a.replace(/\+/g,"-").replace(/\//g,"_").replace(/\=+$/,"")}
function generateJWT(e,a,r){var n={alg:"none"},t={sub:e,name:a};return r&&(t.picture=r),toBase64URL(n)+"."+toBase64URL(t)+"."}

// generate the jwt
var jwt = generateJWT("user837127", "Jack Park", "https://example.com/jackpark.png");
You call generateJWT() with the sub, name, and picture (optional) parameters, and you get back the JWT string, ready to be passed to the jwt parameter of custom_auth.
Authorization
Now4real gives you full control over the authorization rules applied to your users. For example, you can decide which users can view or post to specific pagechats and define real-time analytics visibility.
The default authorization rules are defined in the Dashboard. Then, through JWT, you can define fine-grained rules for each user and each page of your site.
WARNING: You might think you don’t need Now4real to manage authorization because you have already protected the pages that host the chats and the counters with your authentication system, a paywall, a firewall, or any other mechanism. That’s not the case. Even if a malicious user cannot view the hosting page, they could still access the chat feed or the analytics feed directly if you don’t tell Now4real to protect them.
Chat authorization
From the “Authorization” tab of the site settings in your Now4real Dashboard you can control the default behavior of pagechats.

“View chats” controls chat visibility:
- Public means that all the pagechats of that site are publicly visible to everyone, including non-authenticated users, irrespective of the JWT token (it can be absent, or it can be present and include any claims, but the pagechat will still be public).
- Authenticated means that the content of the JWT determines the visibility of each pagechat. If no JWT is present on the page, the pagechat will not be visible to that user. If a JWT is present on the page, its chatView claim will determine if the pagechat is visible to that user. This way, you can make a pagechat publicly visible, visible to all authenticated users only, visible to some authenticated users only, or even not visible at all.
“Post to chats” is always Authenticated, meaning that the content of the JWT determines the ability to post to each pagechat. If no JWT is present on the page, the user will not be able to post to that pagechat. If a JWT is present on the page, its chatPost claim will determine if that user can post to that pagechat, but only if the sub claim is present (even if you can still enable anonymous chats).
These mechanisms are flexible enough to enable you to implement virtually any chat scenario, as explained in Chat use cases.
The standard Now4real widget will automatically adapt to the configured chat authorization.
Before looking at a few examples, let’s introduce another JWT claim. The iss claim specifies the page where the token is valid. It’s fundamental if you want to restrict the token validity to a specific page of your site, to prevent a user who is granted access to a page from reusing the same token on a different page for which they are not authorized.
NOTE: If you don’t include the iss claim with the page path in all the JWT tokens of your site, a malicious user only needs to get hold of a single token without iss to be able to access all the pagechats of your site, even if all the other pages include tokens with a proper iss claim. On the other hand, if all the pages of your site have the same visibility rules, you can skip the iss claim altogether.
Examples
Let’s see some examples of how the JWT determines the chat rights when both “View chats” and “Post to chats” are set to Authenticated in the Dashboard.
1) Authenticated – Can view – Can post
The current user is authenticated, and you want to allow them to view and post to the current pagechat.
You need to include a JWT with the sub claim. The chatView and chatPost claims can be either absent or set to true (because the default rule set in the Dashboard is that all authenticated users can view and post to all pagechats).
JWT payload example:
{
   "sub": "user837127",
   "name": "Jack Park",
   "picture": "https://example.com/jackpark.png",
   "chatView": true,
   "chatPost": true,
   "iss": "example.com/content/12/this-is-good"
}
This JWT payload allows the current user (Jack Park) to view the current pagechat (chatView true) and to post messages to it (chatPost true), provided that this token is used on the “/content/12/this-is-good” page of the “example.com” site (iss). Any attempt to use this JWT token on other pages would fail.
2) Authenticated – Can view – Can’t post
The current user is authenticated, and you want to allow them to view the current pagechat but not to post to it.
You need to include a JWT with the sub claim. The chatView claim can be either absent or set to true, while the chatPost claim must be set to false.
JWT payload example:
{
   "sub": "user837127",
   "name": "Jack Park",
   "picture": "https://example.com/jackpark.png",
   "chatView": true,
   "chatPost": false,
   "iss": "example.com/content/12/this-is-good"
}
This JWT payload allows the current user (Jack Park) to view the current pagechat (chatView true) but not to post messages to it (chatPost false), provided that this token is used on the “/content/12/this-is-good” page of the “example.com” site (iss). Any attempt to use this JWT token on other pages would fail.
3) Authenticated – Can’t view – Can’t post
The current user is authenticated, but you want to deny them to view and post to the current pagechat.
You need to include a JWT with the sub claim. The chatView and chatPost claims must be set to false.
JWT payload example:
{
   "sub": "user837127",
   "name": "Jack Park",
   "picture": "https://example.com/jackpark.png",
   "chatView": false,
   "chatPost": false,
   "iss": "example.com/content/12/this-is-good"
}
This JWT payload does not allow the current user (Jack Park) to view the current pagechat (chatView false) nor to post messages to it (chatPost false).
It’s even possible to have the “Authenticated – Can’t view – Can post” combination (chatView false and chatPost true), but it’s a very corner case, so that we won’t include it as an example here. Let’s move on to the unauthenticated user cases instead.
4) Not authenticated – Can’t view – Can’t post
The current user is not authenticated, and you want to deny them to view and post to the current pagechat.
You will simply not include the jwt parameter inside the custom_auth property of the now4real.config object:
custom_auth: {
  enabled: true
}
You would achieve the same behavior if you include a JWT without the sub and chatView claims or if you include an invalid JWT (for any reason: incorrect signature, missing parameters, token expired, etc.).
If you want to show a link inside the Now4real chat box to allow unauthenticated users to go directly to the login page of your site, you just need to add a property to custom_auth:
custom_auth: {
  enabled: true,
  signin_url: 'https://example.com/login'
}
5) Not authenticated – Can view – Can’t post
The current user is not authenticated, and you want to allow them to view the current pagechat but not to post to it.
You need to include a JWT that does not contain the sub claim but contains the chatView claim set to true. The chatPost claim is not necessary because without the sub claim, you cannot grant post rights to that user.
JWT payload example:
{
   "chatView": true,
   "iss": "example.com/content/12/this-is-good"
}6) Not authenticated – Can view – Can post
The current user is not authenticated, but you want to allow them to view and post to the current pagechat.
This is the typical case where you want to allow anonymous posting to chats. You can achieve this in three different ways:
- The easiest way is not using Custom Aut at all. You simply choose “No registration” in the Authentication section of your website configuration in the Now4real Dashboard.
- If you prefer to use Custom Auth, you can use the same JWT token for all the users, resulting in the same display name for everyone (something like “anonym”), thus making the chat truly anonymous.
- Otherwise, you can use unsecured JWT tokens (by disabling “Secure authentication” in the Dashboard) and define the desired display name directly on the client side (without any verification). In this case, you have a couple of options:
- You can assign different predefined names to different users (something like “user1”, “user2”, etc.).
- You can ask users what nickname they want. To achieve this, you will probably startup Now4real as unauthenticated and display your own input field on the page to get the nickname. The user can view the chat messages, but can’t post until they enter a nickname. At that point, you will create an unsecured JWT token with the nickname and call the reload() method on the Now4real API to assign the nickname to that user.
Chat use cases
Let’s use the concepts learned above to highlight just some of the typical chat scenarios you might find useful for your website.
Publicly visible chat but only signed-in users can post messages
Dashboard configuration
- JWT authentication: ON
- View chats: Public
- Post to chats: Authenticated
JWT configuration
- For not signed-in users, no JWT tokens are required.
- For signed-in users, include JWT tokens with “sub” and without “chatView” and “chatPost”.
Protected chat where only signed-in users can view and post messages
Dashboard configuration
- JWT authentication: ON
- View chats: Authenticated
- Post to chats: Authenticated
JWT configuration
- For not signed-in users, no JWT tokens are required.
- For signed-in users, include JWT tokens with “sub” and without “chatView” and “chatPost” (or with both “chatView” and “chatPost” set to true).
Protected chat where only some specific signed-in users can view and post messages
A typical case would be a website section where only a group of selected users (e.g., the admins) can chat with each other.
Dashboard configuration
- JWT authentication: ON
- View chats: Authenticated
- Post to chats: Authenticated
JWT configuration
- For not signed-in users, no JWT tokens are required.
- For all the signed-in users who are not authorized on this pagechat, include a JWT token with “sub” and with both “chatView” and “chatPost” set to false.
- For all the signed-in users who are authorized on this pagechat, include a JWT token with “sub” and with both “chatView” and “chatPost” set to true.
Public debates and panels
A live debate or panel discussion where everybody can be part of the audience, but only the panelists can post chat messages.
Dashboard configuration
- JWT authentication: ON
- View chats: Public
- Post to chats: Authenticated
JWT configuration
- For not signed-in users, no JWT tokens are required.
- For signed-in users who are not panelists, include a JWT token with “sub”, with “chatView” set to true, and with “chatPost” set to false.
- For the panelists, include a JWT token with “sub” and with both “chatView” and “chatPost” set to true.
Protected debates and panels
A live debate or panel discussion where only some selected signed-in users can be part of the audience, and only the panelists can post chat messages.
Dashboard configuration
- JWT authentication: ON
- View chats: Authenticated
- Post to chats: Authenticated
JWT configuration
- For not signed-in users, no JWT tokens are required.
- For signed-in users who are not panelists and should not be part of the audience, include a JWT token with “sub” and with both “chatView” and “chatPost” set to false.
- For signed-in users who are not panelists but should be part of the audience, include a JWT token with “sub”, with “chatView” set to true, and with “chatPost” set to false.
- For the panelists, include a JWT token with “sub” and with both “chatView” and “chatPost” set to true.
Live commentary
A real-time commentary where only the commentator can post messages and all the others are part of the audience.
Dashboard configuration
- JWT authentication: ON
- View chats: Public
- Post to chats: Authenticated
JWT configuration
- For not signed-in users, no JWT tokens are required.
- For signed-in users other than the commentator, include a JWT token with “sub”, with “chatView” set to true, and with “chatPost” set to false.
- For the commentator, include a JWT token with “sub” and with both “chatView” and “chatPost” set to true.
There are plenty of other combinations possible. Feel free to play around with authorization and let us know if you have a special use case that doesn’t seem to be supported!
Analytics authorization
Now4real is a dual-purpose tool. On one side, it manages live group chats on your website. On the other side, it manages presence detection of users on your website and real-time analytics based on presence.
From the “Authorization” tab of the site settings in your Now4real Dashboard you can control the visibility of Now4real’s real-time analytics and presence detection.
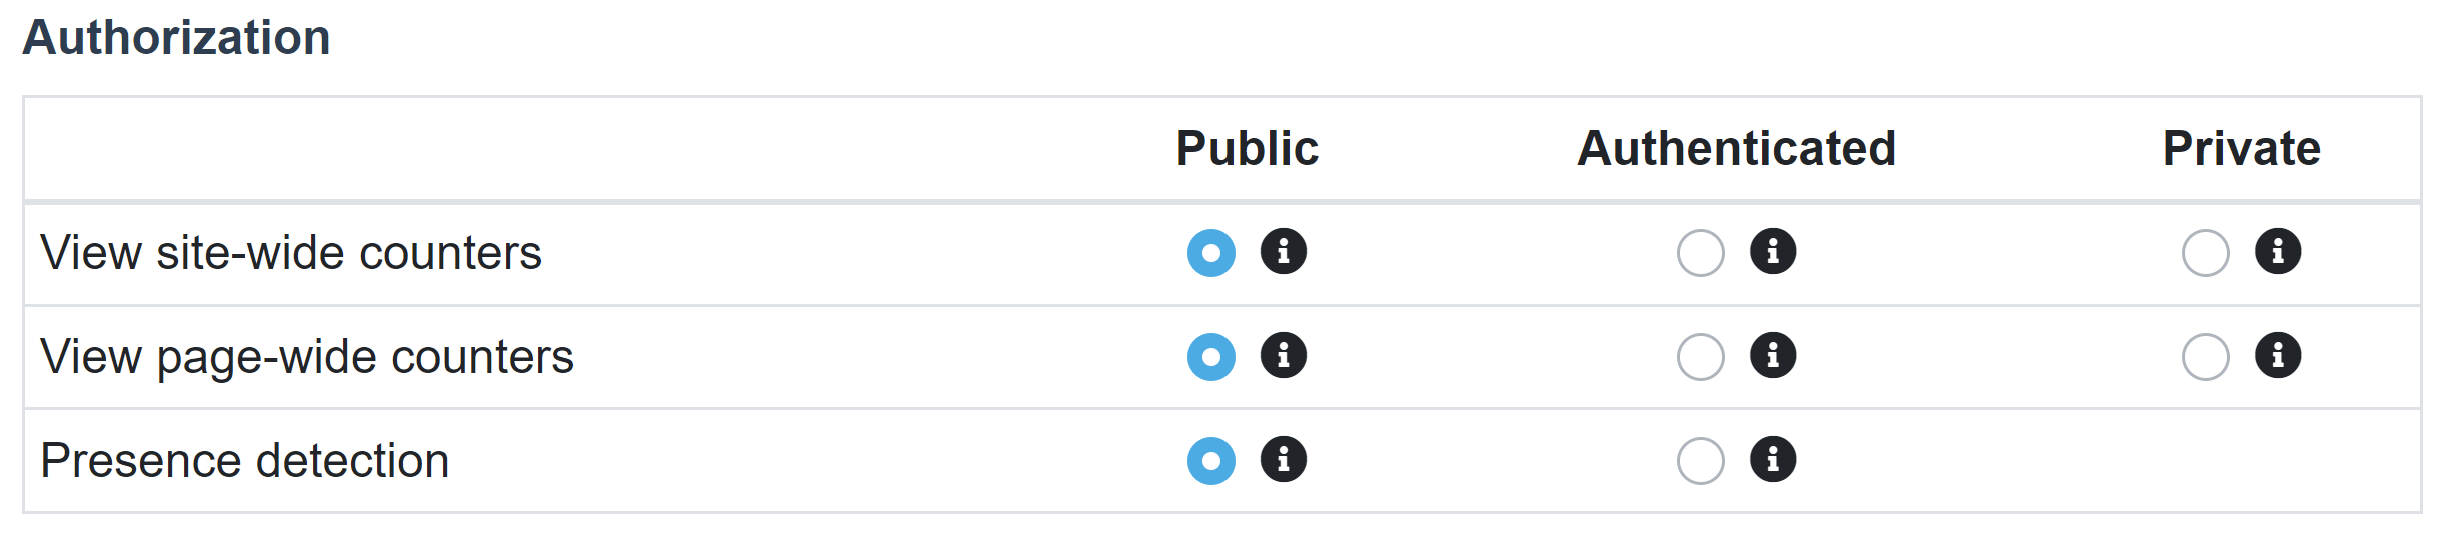
“View site-wide counters” refers to all the real-time counters and analytics at the site level. These include:
- Total users present on the website (real-time values and absolute peak)
- Total users chatting on the website (real-time values and absolute peak)
- World heatmap with geographical distributions of users on the website (real-time values)
“View page-wide counters” refers to all the real-time counters and analytics at the page level. These include:
- Users present on each page of the website (real-time values)
- Users chatting on each page of the website (real-time values)
- World heatmap with geographical distributions of users on each page of the website (real-time values)
- List of pages of the website with most users and most chatters (real-time values)
You can set the visibility of site-wide counters and page-wide counters independently, choosing among these options:
- Public: This is the default setting. The counters are publicly visible to everyone, including non-authenticated users. They are also visible on the Real-Time Stats pages (both the Global Stats and the site-specific stats available at addresses like https://now4real.com/stats#example.com). Only the real-time analytics are publicly visible, while the historical analytics are always private.
- Authenticated: Only authenticated users with a valid JWT token containing the sub claim can view the counters. This option can be set only if the “JWT authentication” switch is enabled in the Dashboard. Only the real-time analytics are visible to authenticated users, while the historical analytics are always private.
- Private: The counters are only visible by the admin through the Dashboard, in the Real-Time Stats section. This option can be set only if the “Custom Auth” switch is enabled in the Dashboard (only “Custom Auth” is required, while “JWT authentication” doesn’t need to be enabled). NOTE: When setting or unsetting the Private options, it may take up to 1 hour before the changes are reflected on the clients.
The standard Now4real widget will automatically adapt to the configured analytics visibility.
“Presence detection” refers to the capability of Now4real to detect when a user is displaying a web page in the foreground. This is what actually feeds all the counters and analytics. Presence is normally detected for all the users who are displaying the page, irrespective of whether they are authenticated. Indeed, if a user is counted as present, it doesn’t mean they will be able to see the chat and the counter, which are aspects governed by the other settings above. But there might be cases where you actually want to count only authenticated users. In these unlikely scenarios, you can set “Presence detection” to Authenticated. Please consider that this will automatically set all the other options to Authenticated too, if they are Public.
JWT reference
Now4real follows the standard JWT format and rules, as specified in RFC 7519. Below is the reference documentation of all the parameters supported by Now4real.
In all the cases where the token is not valid, for any reason, the user is not authenticated and is considered anonymous.
Header
The JWT header must contain the following parameters:
typ
optional
type: string
Must be “JWT”.
Example:
"typ": "JWT"alg
optional
type: string
Can be “HS256”, “RS256” or “none”.
In case of “none”, the JWT is unsecured and the encoded JWS Signature is the empty string.
Example:
"alg": "HS256"Payload
The JWT payload can contain the following claims:
sub
optional
registered claim name
type: string
An id that uniquely identifies that user on that website. If the same id is used for different websites of the same Now4real publisher account, the user will be considered the same across those websites.
If absent, the user is not authenticated and is considered anonymous.
Example:
"sub": "ab1234567"name
mandatory if sub is present
private claim name
type: string
Name of the user, displayed in the chat.
Example:
"name": "John Doe"picture
optional
private claim name
type: string
URL of the user picture, displayed in the chat.
Must use the HTTPS protocol. The image can use any graphic format supported by the web browser.
If absent or empty, the standard Now4real widget automatically creates a colored circle with the name initials.
Example:
"picture": "https://example.com/jdab123.png"chatView
optional
private claim name
type: boolean
Defines whether the current user can view the current pagechat.
This claim is taken into consideration only if “View chats” is set to “Authenticated” for the current site in Dashboard > Sites > Settings > Authorization.
If absent, the configuration of “View chats” in the Dashboard determines the actual behavior.
Example:
"chatView": falsechatPost
optional
private claim name
type: boolean
Defines whether the current user can post to the current pagechat.
This claim is taken into consideration only if the “sub” claim is present in the token.
If absent, the configuration of “Post to chats” in the Dashboard determines the actual behavior (which can only be “Authenticated”; so, a valid JWT with the “sub” claim is needed to post to the current pagechat).
Example:
"chatPost": falseiss
optional
registered claim name
type: string
Specifies the Site Context and, optionally, the Page Context where this token is valid. If the Site Context and the Page Context of the web page that includes this token do not match iss, the token is not valid.
The iss syntax is: siteContext[pageContext]
Please refer to the documentation on the siteContext and pageContext properties of the Now4real object for a full understanding on how they are computed.
If absent or empty, the token is valid on any page of any site. In any case, there is no risk that the token may be used on other sites because the JWT secret is different for every site.
If the site has different visibility policies for different sections, it is recommended to use the “iss” claim with the Page Context to prevent a user who is granted access to a section from reusing the same token to access another section for which they are not authorized.
Examples:
"iss": "example.com"The token is valid on any page of the example.com website.
"iss": "example.com/"The token is valid only on the homepage of the example.com website.
"iss": "example.com/content/12/this-is-good"The token is valid only on the page with Page Context “/content/12/this-is-good” of the example.com website.
exp
optional
registered claim name
type: number
Expiration time after which the JWT must not be accepted for processing. If the token expires while a session for that user is active, the client will be disconnected and a page reload might be needed to retrieve a new token.
The value is expressed as the number of seconds past 1970-01-01 00:00:00Z.
If absent or empty, the token will last forever. To invalidate the token, it will be necessary to generate a new secret.
Example:
"exp": 1653639294nbf
optional
registered claim name
type: number
Time on which the JWT will start to be accepted for processing (“nbf” stands for “not before”).
The value is expressed as the number of seconds past 1970-01-01 00:00:00Z.
If absent or empty, the token will be accepted immediately.
Example:
"nbf": 1624781694iat
optional
registered claim name
type: number
Time at which the JWT was issued (“iat” stands for “issued at”).
If it’s in the future, the token is not valid.
The value is expressed as the number of seconds past 1970-01-01 00:00:00Z.
If absent or empty, there is no impact on token validity.
Example:
"iat": 1622103294Add Now4real to your site today
Easy. Free. Instant.
Let visitors chat, discover hot pages, and build instant communities—right on your website.

Details and disclaimer