Quickstart

Add Now4real to your site

Add Now4real to your website to instantly offer your visitors some new exciting features. They can see, in very real time, how many people are viewing the same page they have opened in their browser. They can do a group chat with them (a pagechat). They can see which pages of your website are being viewed by most people at that moment. And much more!

Luckily enough, adding Now4real to your site is as easy as pie because it’s a fully managed cloud service. There are three ways to add it, from ridiculously easy to coding with the API. Let’s see them all.

For full details on Now4real’s philosophy and vision, please read The Instant Communities Manifesto.

The ridiculously easy way

The easiest way to add Now4real to your site is to use the ready-made widget with its out-of-the-box configuration. You just need to add one single line of code to all the pages of your website (yes, we call it the magic line of code):

<script async src="https://cdn.now4real.com/now4real.js"></script>

You can put this line wherever you want, even if it is usually inserted before the </body> tag at the end of the page or within the <head> section at the beginning of the page.

This will display the blue Now4real widget in the bottom-left corner of all your pages (similar to the one you see on this very page). If you want to change the position, the color, or the behavior of the widget, or if you wanto to embed it in your page, rather than showing it as a popup, check out The easy way below.

There are several ways to add this line of code to the pages of your site, depending on what platform it is based on. For example, if your site is based on WordPress, we will release a plugin soon, but in the meanwhile, just follow these easy steps: 1) Install and activate a third-party plugin called Header and Footer Scripts. 2) Go to Settings > Header and Footer Scripts. 3) Paste the code copied from above into the “Scripts in footer” area and click Save settings.

Congratulations! That’s all, really. As soon as you put the code on your pages, Now4real starts working seamlessly, and you are not required to do anything else. But we suggest you register your site on the Now4real Publisher Dashboard. The Dashboard gives you full control over how Now4real works on your site and provides you with historical analytics, access to the full chat transcripts, and many other features. For example, chat messages are ephemeral and disappear, by default, after 3 hours. From the Dashboard, you can configure message duration between 1 minute and 4 weeks. Skip to Register your site below to learn how to do add your site to the Dashboard (again, that’s extremely easy).

If you need a bit of instruction on how to use the Now4real widget as an end user, check out the Help page.

The easy way

If you want to configure any of the widget parameters, such as colors or position, you need to add a slightly longer code snippet to all the pages of your website, instead of the single line above. Here you go:

<script type="text/javascript">
  window.now4real = window.now4real || {};
  now4real.config = {
    widget: {
      color_external_background: '#39AAE1', color_external_text: '#FFF',
      color_internal_background: '#39AAE1', color_internal_text: '#FFF',
      // logo_url: 'https://example.com/logo.png', // premium feature
      align: 'left'
    },
    scope: 'page'
  };
  (function () { var n4r = document.createElement('script'); n4r.type = 'text/javascript'; n4r.async = true; n4r.src = 'https://cdn.now4real.com/now4real.js'; var s = document.getElementsByTagName('script')[0]; s.parentNode.insertBefore(n4r, s); })();
</script>

The part you can modify is the now4real.config object, where you can put your own configuration parameters.

For example, the code snippet above defines two parameters:

  • widget contains an object that defines the colors of the widget (blue and white, in this case, which is the same as the default configuration, for both the closed widget and the open widget) and aligns is to the left.
  • scope tells Now4real whether to create a single pagechat or not. The two possible values are:
    • ‘page’ creates a different pagechat for every page of the site. Chat messages posted by the visitors of a page can be seen only on that page and not on other pages. Furthermore, the widget bubble shows two counters: the current number of viewers of the current page and the current number of viewers of the site.
    • ‘site’ (default value) creates a single pagechat shared among all the pages of the site. Chat messages posted by the visitors of a page can be seen on any other pages. The widget bubble shows only the counter of the current viewers of the site.
      TIP: The “site” behavior is useful for websites and blogs with small numbers of concurrent viewers because it allows users to meet easily, even if they are on different pages. This is the reason why we chose it as the default option. On the other hand, for sites with more visitors, you might want to go for the “page” behavior.

You will probably want to change the colors and the position of the widget to adapt to the look-and-feel of your site. For example, let’s configure Now4real with a black and orange icon aligned to the right of the page and with the site scope (the default, so we don’t need to declare it). For the open widget, let’s use inverted colors (black background and orange text). You will need to put a string like the below in now4real.config:

widget: {
  color_external_background: '#F66F00', color_external_text: '#000',
  color_internal_background: '#000', color_internal_text: '#F66F00',
  align: 'right'
}

The resulting code snippet becomes like this:

<script type="text/javascript">
  window.now4real = window.now4real || {};
  now4real.config = {
    widget: {
      color_external_background: '#F66F00', color_external_text: '#000',
      color_internal_background: '#000', color_internal_text: '#F66F00',
      align: 'right'
    }
  };
  (function () { var n4r = document.createElement('script'); n4r.type = 'text/javascript'; n4r.async = true; n4r.src = 'https://cdn.now4real.com/now4real.js'; var s = document.getElementsByTagName('script')[0]; s.parentNode.insertBefore(n4r, s); })();
</script>

If you prefer to embed the chatbox in your page, instead of displaying it as a popup overlay, you simply need to define a div element in your page that acts as a container. Then, let Now4real know the id of the div. The Now4real chatbox will automatically adapt to the size of your div.

Let’s say you defined a div like this in your page:

<body>
    ...
    <div id="n4r-wrapper" style="width: 50%; height: 600px;"></div>
    ...
</body>
  

You will simply need to add the container parameter to your widget object:

widget: {
  container: 'n4r-wrapper'
}

There are several other parameters you can use within the now4real.config object. They give you control over other aspects, like widget visibility and logging.

The full list of parameters is available in the API reference documentation, under the Config object. Check them out and play.

To learn how to replace social login with single sign-on (SSO) and take full control over authentication and authorization, check out the Custom Auth documentation.

As explained in the previous section, putting the code above on your website is enough to see Now4real working, even in production. But we suggest you register your site on the Now4real Publisher Dashboard to take benefit from the many features and configurations available. For example, in the Dashboard you can configure special roles for your users, such as “guest” and “moderator“, together with custom badges.
Skip to Register your site below to learn how to do it.  

The coding way

Ok, you like to code or you need to fully integrate the Now4real service with your front end and presentation logic. In other words, you prefer not to use the out-of-the-box Now4real widget. Good news! The Now4real widget is built upon a modern, developer-friendly, and well-documented JavaScript API. When designing Now4real, we focused on the API first, and we built our widget with no shortcuts, only using the public API. We are pretty sure you will enjoy using the Now4real API directly 

You have two options. One is to fork the default widget to build your own [we will release it on GitHub soon… stay tuned]. The other is to start from scratch with the API, as we are going to show in the tutorial below.

But first, what are some good reasons to build your own Now4real client? Here are a few:

  • You can create your own widgets, from the most minimalistic to the utterly massive ones… We’d love to see your creativity!
  • You can show the presence counters directly inside your pages, rather than in a widget. Imagine a news site homepage, containing the titles of the articles. Wouldn’t it be amazing to show the number of current readers in real time next to each title? The same applies to the real-time ranking of the top pages.
  • The Now4real API contains a full-fledged chat API. You can display the pagechats the way you prefer and integrate them wherever you want. And you can implement your own chat front-end, leveraging the fully managed chat back-end of Now4real (the Now4real cloud).

While developing with Now4real, please consult the API reference documentation.

In case of doubt, or for any issue or feedback, get back to us through the public forum or drop us an email at support@now4real.com.

A few definitions

Let’s quickly introduce a few terms to make sure we are on the same page…

  • Page presence: Presence of a person on a page of a website (the browser tab must be in the foreground at that moment).
  • Instant community: Group of people present on the same web page at the same moment.
  • Page viewer counter: Real-time counter of people who are present on a page.
  • Site viewer counter: Real-time counter of people who are present on any page of the site.
  • Pagechat: A group chat that lives on a web page (it’s like a chat room dedicated to that page).
  • Page chatter counter: Real-time counter of people who are chatting on a page (in a pagechat).
  • Site chatter counter: Real-time counter of people who are chatting on any page of the site (in any pagechat).
  • Page viewer ranking: Real-time list of pages with most viewers.
  • Page chatter ranking: Real-time list of pages with most chatters.
  • Page viewer heatmap: Real-time density of page viewers on the world map (at country level).
  • Site viewer heatmap: Real-time density of site viewers on the world map (at country level).

The Now4real API enables you to get these and other data very much in real time from the Now4real cloud. More specifically, these are subjects you can subscribe to so that you’ll get values asynchronously pushed to your code (synchronous get method is available too).

In addition, the Now4real API contains all the building blocks to build a chat, including authentication, message delivery, typing indicators, error management, etc.

Quick tutorial

Let’s use the Now4real API to create a very simple web page that shows the page viewer counter in real time.

Create an HTML page

First, let’s create a simple page that will contain our project code. Create an empty file named tutorial.html and paste the code below.

<!DOCTYPE html>
<html lang="en">
<head>
  <meta charset="utf-8">
  <title>Tutorial: real-time presence counter</title>
</head>
<body>
</body>
</html>

Load the Now4real library

It is enough to load the Now4real library to see things happen. The library will immediately connect to the Now4real cloud and will automatically send a presence signal when a user has the page in the foreground.

To load the library, paste the code below before the </body> tag.

<script>
  window.now4real = window.now4real || {};
  now4real.config = {
    target: 'api'
  };
  now4real.onload = function () {
    console.log('Now4real loaded');
  };
  (function () { var n4r = document.createElement('script'); n4r.type = 'text/javascript'; n4r.async = true; n4r.src = 'https://cdn.now4real.com/now4real.js'; var s = document.getElementsByTagName('script')[0]; s.parentNode.insertBefore(n4r, s); })();
</script>

This code loads the library from the https://cdn.now4real.com/now4real.js URL, specifying that we only need the API and not the widget (see target: ‘api’ in now4real.config). It then logs a message to the browser console when the library is loaded (see now4real.onload).

Add the front end

Let’s add some basic HTML markup to display our presence counter.

Paste the code below after the <body> tag.

  <h1>Real-time presence counter</h1>
  <div id="counter" style="color: #39aae1; font-size: 3rem; font-weight: bold">
    -
  </div>
  <div>This is the number of people who are viewing this page right now!</div>
  <p>
    <b>Context:</b><br>
    <span id="context" style="color: #39aae1; font-size: 1.2rem"></span>
  </p>

The real-time counter updates will be displayed inside the div element with id=”counter”. In the span element with id=”context” we will display the page context (more details below).

Get the counter

To receive real-time asynchronous updates to the counter, we’ll subscribe to the COUNTER_PAGE_VIEWERS subject.

Paste the code below after the <script> tag.

  function subscribeCounter () {
    const counterEl = document.getElementById('counter');

    now4real.subscribe('COUNTER_PAGE_VIEWERS', function (counterUpdate) {
      let updatedValue = counterUpdate.data.value;
      counterEl.innerText = updatedValue;
    });
  }

The subscribeCounter function uses the Now4real API to subscribe to the COUNTER_PAGE_VIEWERS subject while defining a callback function that is called every time a new update is pushed from the Now4real cloud. We read the update value (counterUpdate.data.value) and write it into the div element with id=”counter”.

Get the context

This part of the tutorial is not needed for reaching our goal of displaying the real-time presence counter, but it is useful to help you understand another concept of Now4real.

How does Now4real decide whether different users should be considered on the same page so that it can increase the same counter? By means of the context.

First, the site must be the same. Now4real gets the site as the window.location.host of the page. This is called the site context.

Then, the page must be the same. Now4real gets the page as the window.location.pathname of the page (with a few exceptions). This is called the page context.

By concatenating the site context and the page context, you can know the full context of the page. To display it, paste the code below after the subscribeCounter function.

  function showContext () {
    let context = now4real.siteContext + now4real.pageContext;
    document.getElementById('context').innerText = context;
  }

The showContext function uses the Now4real API to get the site and page contexts and write them into the span element with id=”context”.

In the Let’s play section, we will explain what’s the context of pages loaded from the disk. To learn full details about contexts, please check out pageContext and siteContext in the Now4real API reference.

Putting it all together

Below is the final code of our tutorial.html page. You can also find it on GitHub.

<!DOCTYPE html>
<html lang="en">
<head>
  <meta charset="utf-8">
  <title>Tutorial: real-time presence counter</title>
</head>
<body>
  <h1>Real-time presence counter</h1>
  <div id="counter" style="color: #39aae1; font-size: 3rem; font-weight: bold">
    -
  </div>
  <div>This is the number of people who are viewing this page right now!</div>
  <p>
    <b>Context:</b><br>
    <span id="context" style="color: #39aae1; font-size: 1.2rem"></span>
  </p>

<script>
  function subscribeCounter () {
    const counterEl = document.getElementById('counter');

    now4real.subscribe('COUNTER_PAGE_VIEWERS', function (counterUpdate) {
      let updatedValue = counterUpdate.data.value;
      counterEl.innerText = updatedValue;
    });
  }

  function showContext () {
    let context = now4real.siteContext + now4real.pageContext;
    document.getElementById('context').innerText = context;
  }
  
  window.now4real = window.now4real || {};
  now4real.config = {
    target: 'api'
  };
  now4real.onload = function () {
    console.log('Now4real loaded');
    subscribeCounter();
    showContext();
  };
  (function () { var n4r = document.createElement('script'); n4r.type = 'text/javascript'; n4r.async = true; n4r.src = 'https://cdn.now4real.com/now4real.js'; var s = document.getElementsByTagName('script')[0]; s.parentNode.insertBefore(n4r, s); })();
</script>
</body>
</html>

And this is the result when you open the page in a browser loading it from the disk:

Let’s play!

Now that the sample page is ready, we can have some fun while learning more about contexts and visibility.

You’ve saved your tutorial.html file to the disk. Open it with your favorite browser. The counter should display “1”, unless there’s somebody else in the world who is viewing a similar “tutorial.html” page (more on this later); in this case, just rename the HTML file to a unique name to make this experiment easier. Now open the same file a second time. It will appear in a second browser tab, and the counter will show “1” again because that’s the only tab in the foreground. Now, drag that tab out of the current window, so that you will have two separate browser windows displaying the tutorial page. The counter will show “2”. If you minimize one of the windows, the counter will go down to “1”. You can try with more windows and see the counter increase accordingly.

A page is considered visible if it is displayed in the foreground tab of a non-minimized window. Some browsers can even detect if the window is covered by a different application window and report it as non-visible in this case.

Now deploy the tutorial.html page to a web server, if you have one available. This allows you to open the same page from different devices. For example, open your page from both a desktop computer and a smartphone. You’ll see the counter go to “2”. Switch off the screen of your smartphone, and the counter will go down to “1”. Switch it on, and the counter will go back to “2”. If you don’t have a web server available, we put the tutorial.html page on our own server to let you play with it. You can find it at https://now4real.com/tutorial.html. Obviously, if other people are viewing this page besides you, the counter will reflect that.

Let’s go back to the tutorial.html page loaded from your local file system. You can see that the site context is called shared-public-sandbox.test. This is a special sandbox context that allows you to test your Now4real code without mounting it on an actual domain. This context originates automatically whenever you load the page from the file system or from a web server on localhost.

The nice thing is that the sandbox context is shared among all the Now4real users. As long as you load pages from disk or from a localhost server, you can meet other developers who are working in the sandbox. 

On the other hand, if you load the page from a web server with a domain name, the site context will be given by the domain name. You can see this by loading tutorial.html from your web server or from ours. The site context reported on the page is no more shared-public-sandbox.test but the actual domain name.

One more step… Let’s add the standard Now4real widget to the tutorial.html page, without removing the code we developed above. It’s enough to change the target in your now4real.config object as follows:

  now4real.config = {
    target: 'api+widget'
  };

Reload the page, and you’ll see something like this:

This makes it easy to test all the features of Now4real, including the chat, while you are developing your code.

Finally, how about the page context? As you can see, when loading the page from the disk, it is just the file name (with a leading ‘/’). So, in our tutorial, it’s /tutorial.html (or whatever name you gave to the file). If you load the page from a web server, the full path is taken. So, if you deployed the page at, say, https://www.example.com/test/tutorial.html, the site context will be www.example.com, and the page context will be /test/tutorial.html. Any query string is not considered. This means that the following URLs are all considered part of the same context:

– https://www.example.com/test/tutorial.html
– https://www.example.com/test/tutorial.html?p=4
– https://www.example.com/test/tutorial.html?abc=xyz

Next steps

This tutorial is extremely basic but should help you get started quickly with the Now4real API. There are tons of other things you can do with the API! You can get more counters, ranking lists, and world heatmaps. You can manage social sign up and sign in. You can create your own pagechat front end.

Please take some time to go through the Now4real API reference and explore it.

Again, in case of doubt and for any issue or feedback, get back to us through the public forum or drop us an email at support@now4real.com.

Register your site

Once you integrate Now4real in your site, as shown in the sections above, it will start working straight away. But if you register your site on the Publisher Dashboard, you will get access to more features. The Dashboard gives you full control over how Now4real behaves on your sites and provides you with historical analytics and access to the chat transcripts.

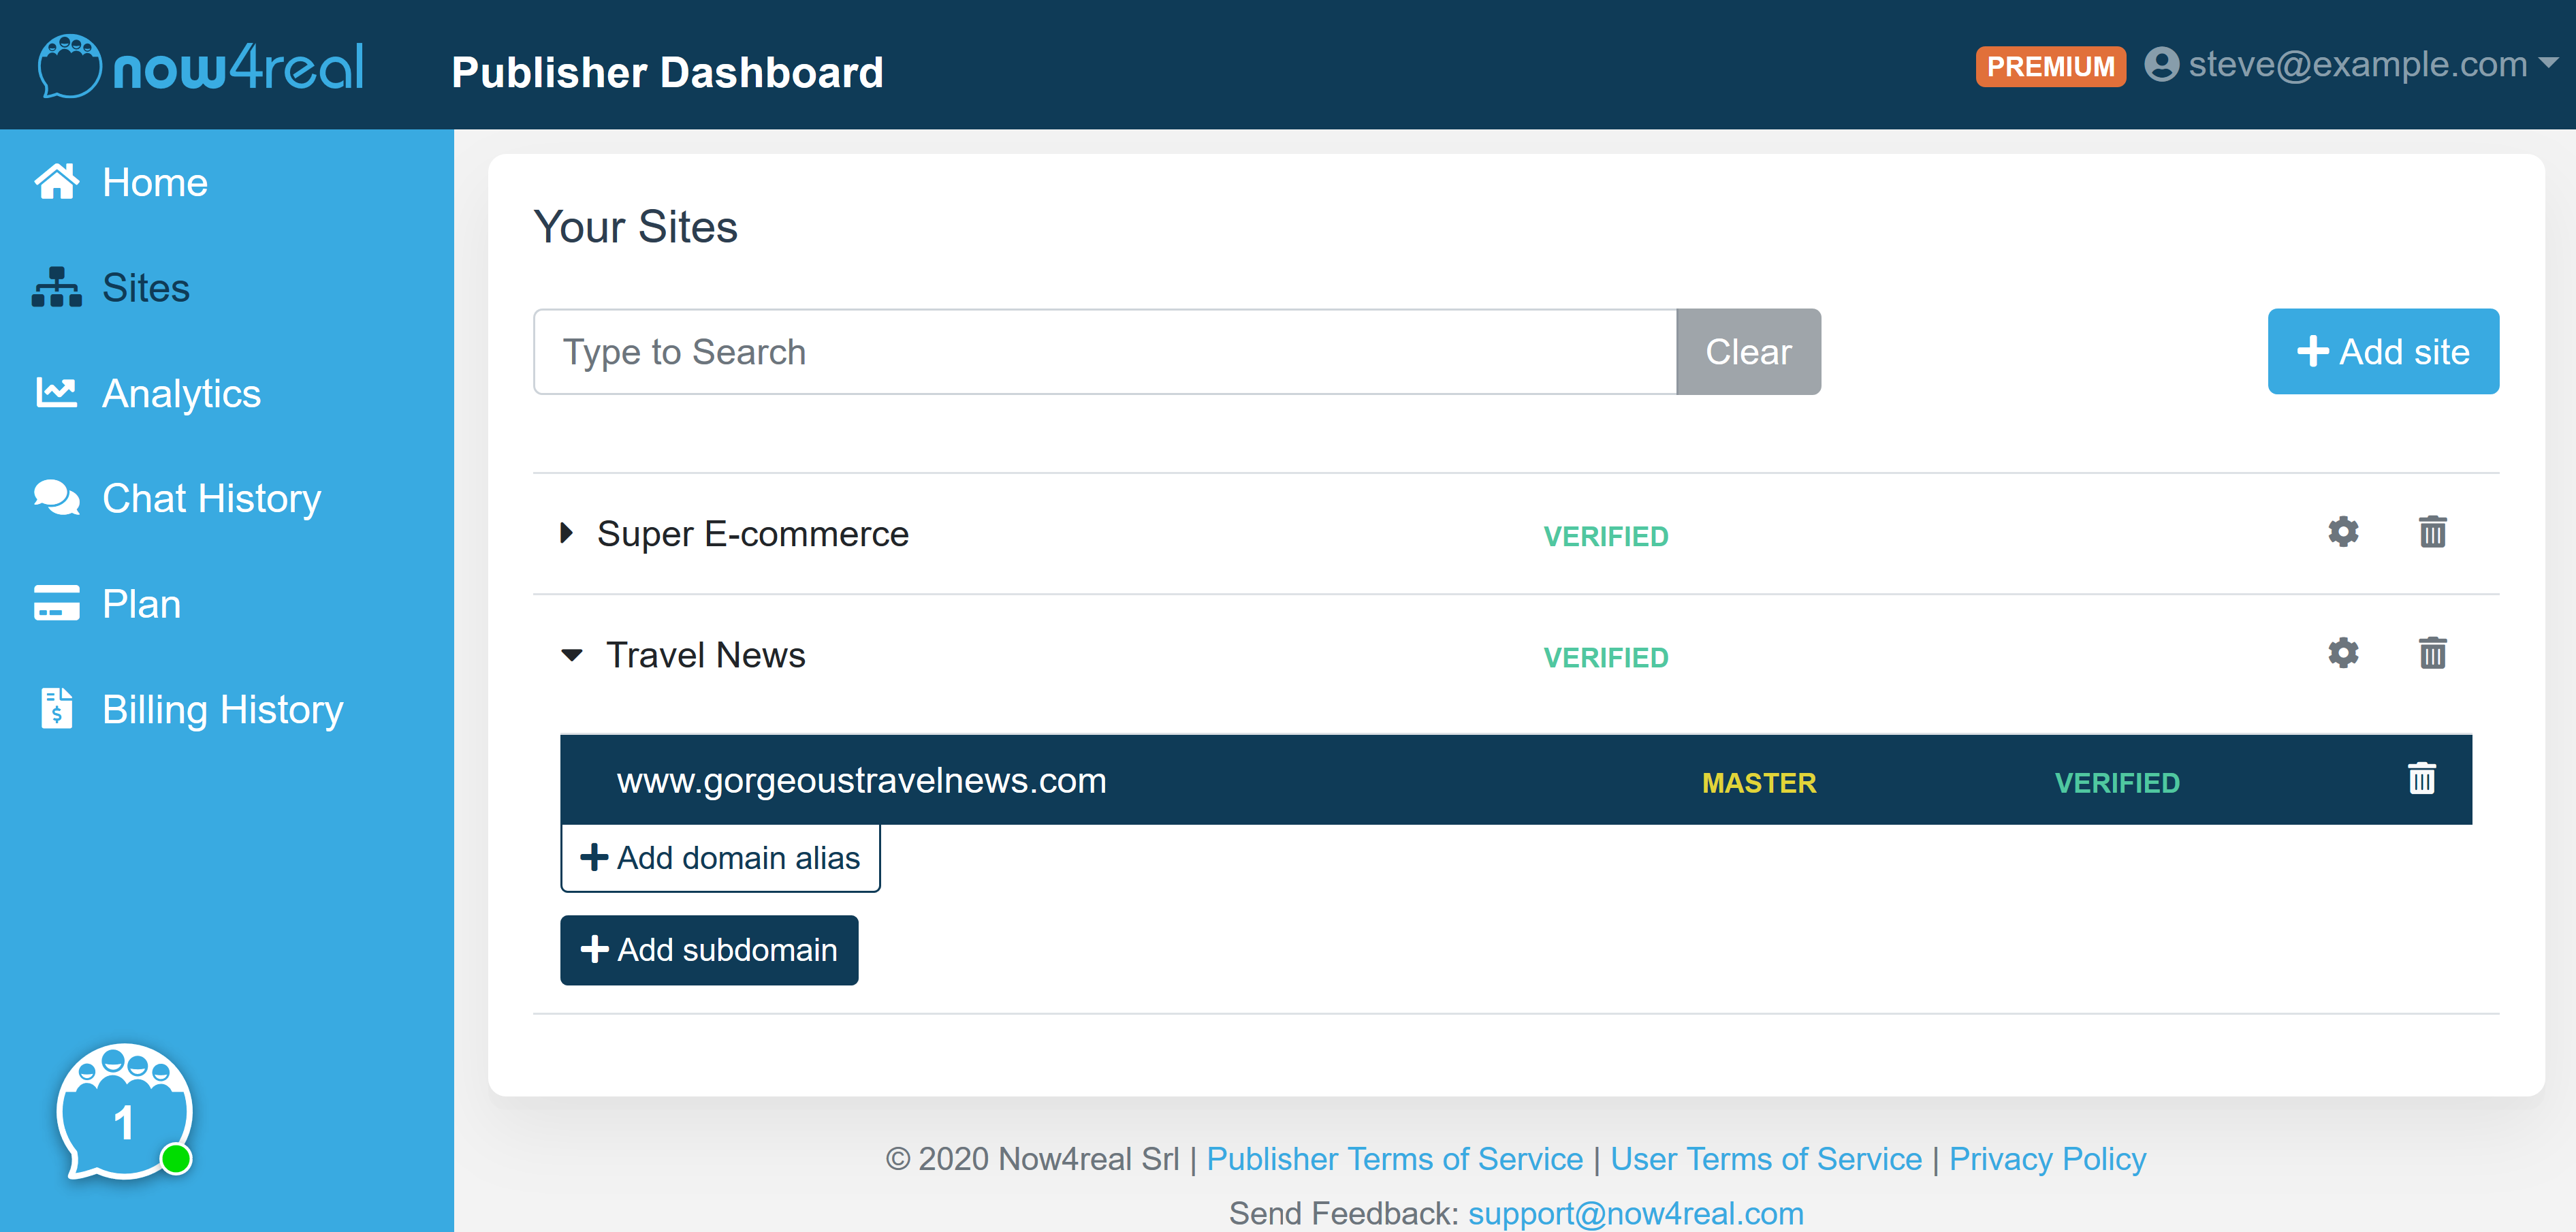
Sign up for free to the Publisher Dashboard at https://dashboard.now4real.com.

Then, you can add your sites and verify them (to demonstrate you are the owner or are in control).

From the Dashboard, you can also upgrade to the Premium plan, if you decide to unlock any of the premium features. For example, chat messages are ephemeral and, by default, the last 3 hours. But from the Dashboard you can configure message duration between 1 minute and 4 weeks.

Easy, right? Now, you are ready to exploit Now4real to its full potential!

Check out your stats

In the Dashboard, you can see some intriguing analytics and real-time stats regarding your websites.

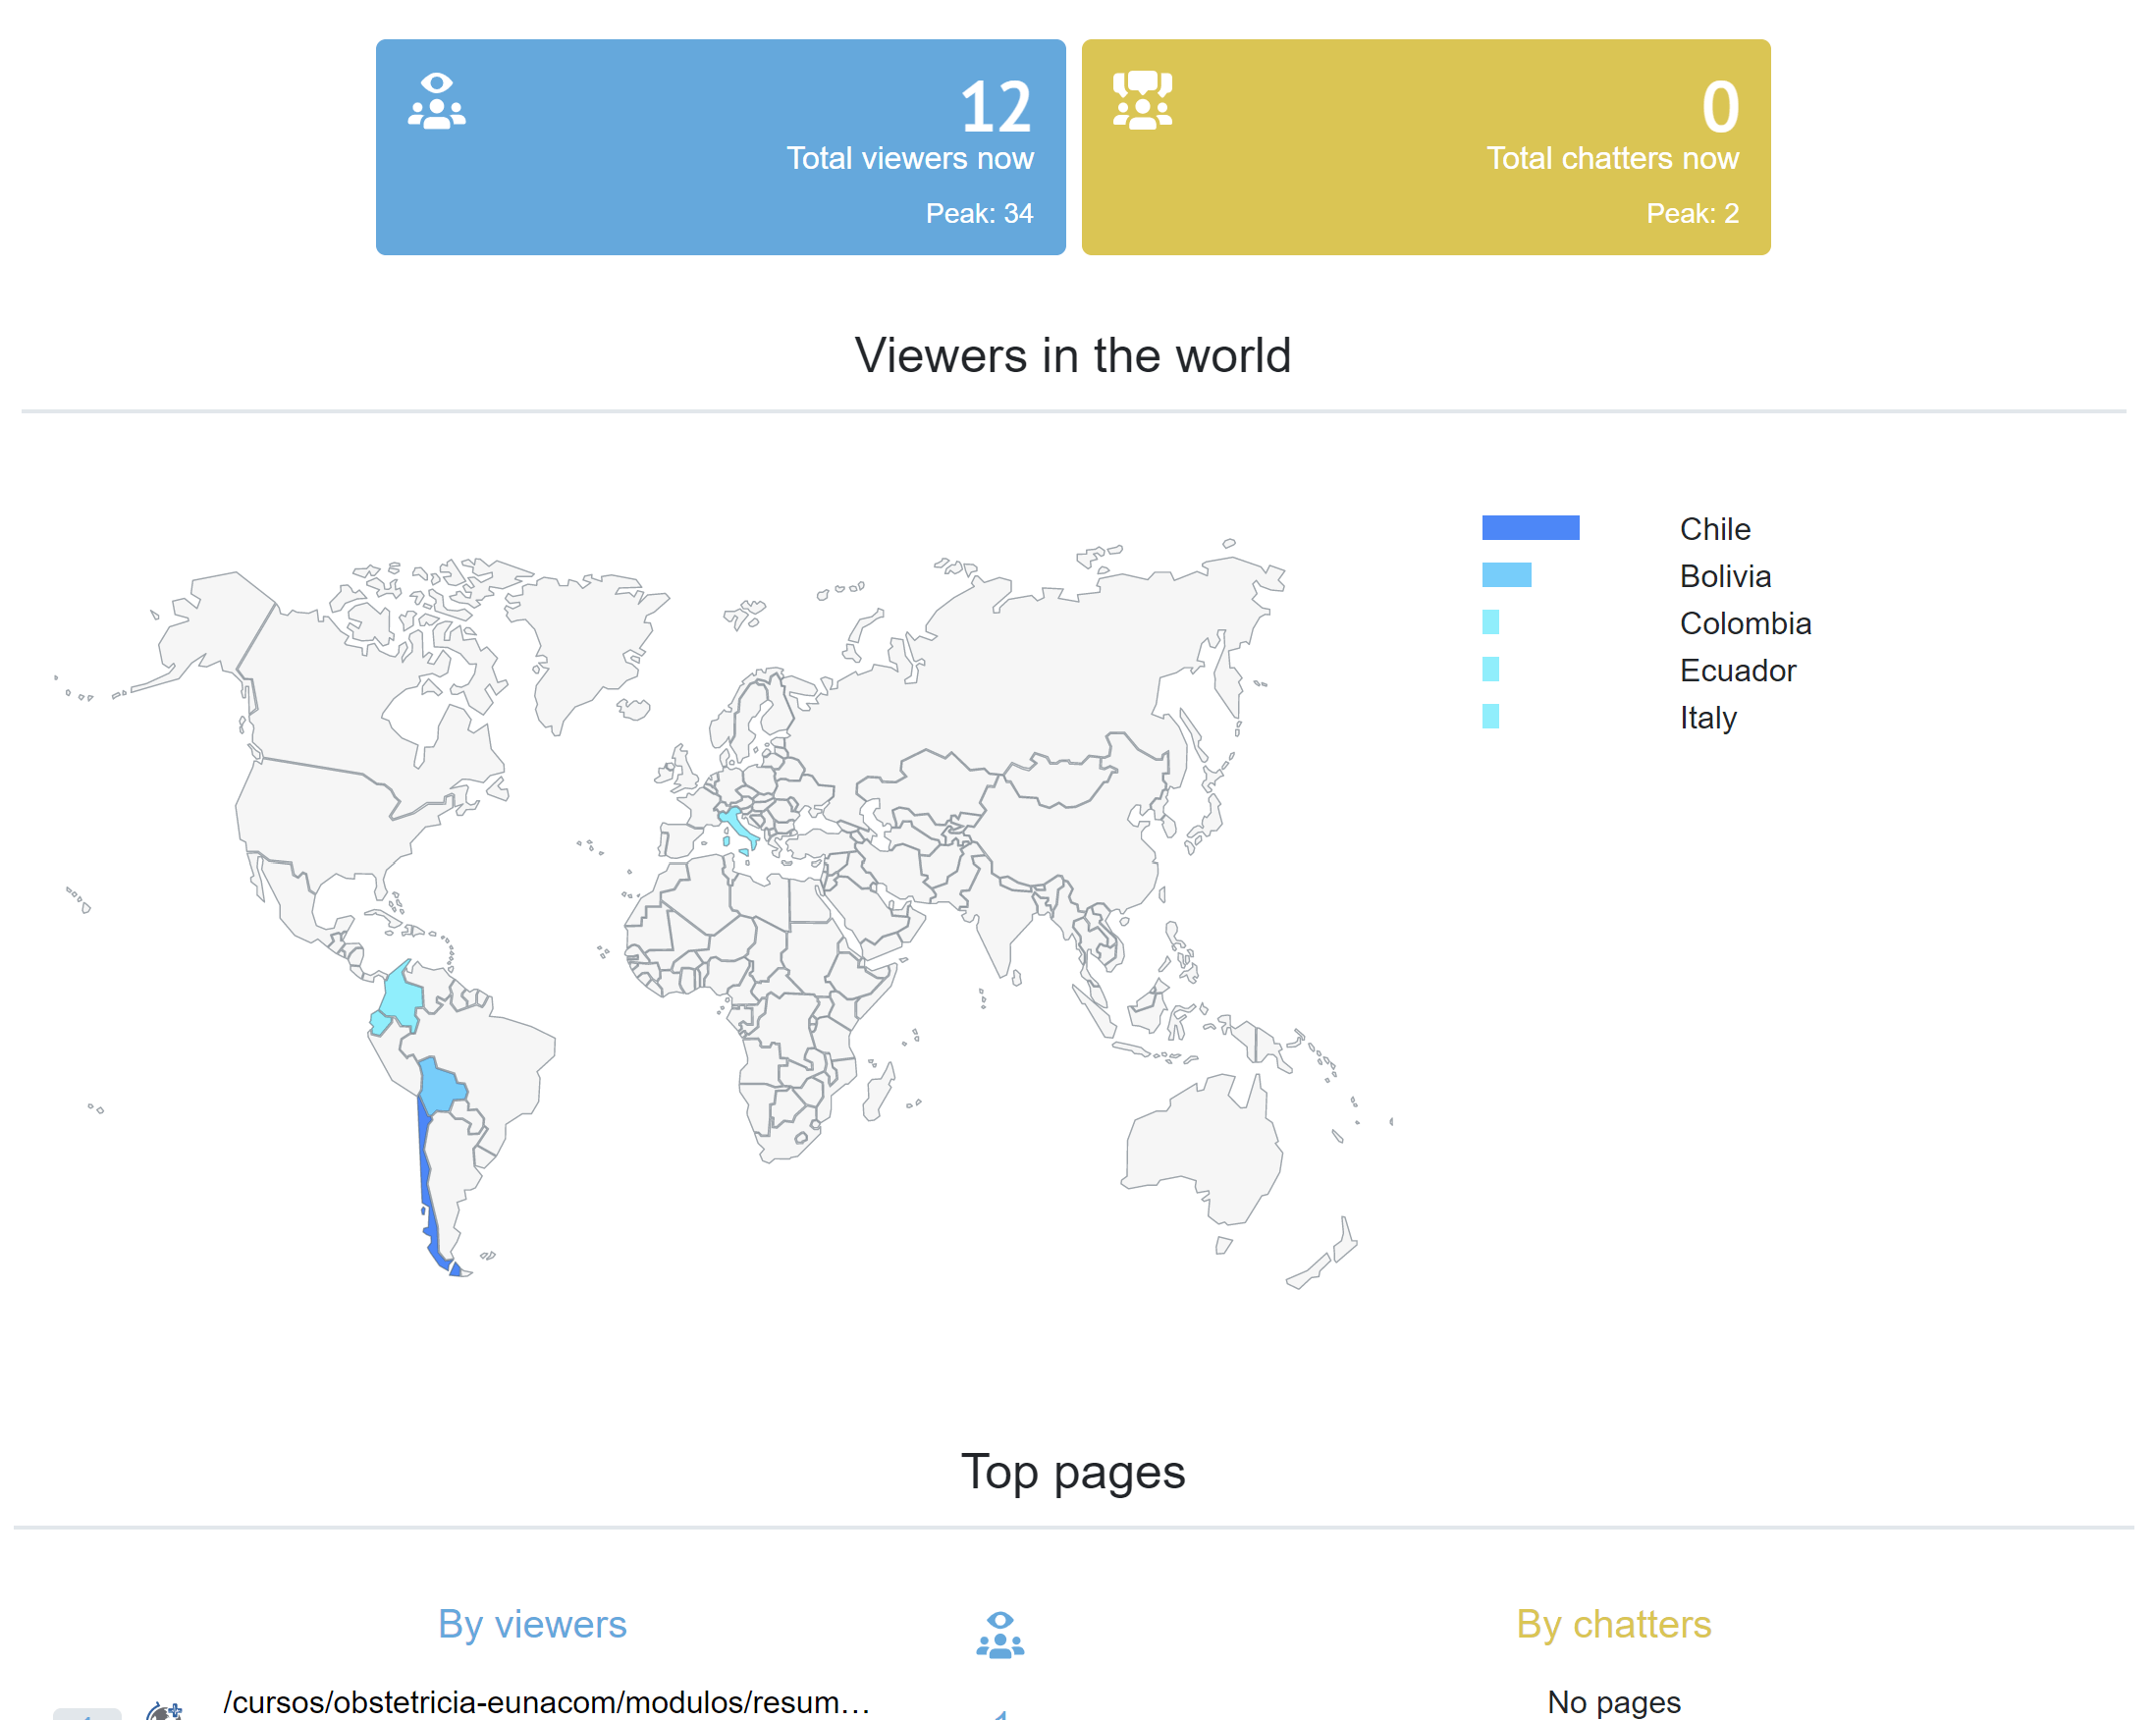
In the Real-Time Stats section, you can watch what your visitors are doing: how many visitors and chatters are present now, what pages they are visiting, and where they come from in the world. This is much more real-time and accurate than Google Analytics Real-Time. But beware, watching Now4real’s real-time stats can be addictive

In the Dashboard home and the Analytics section, you can check out the historical charts of concurrent viewers and concurrent chatters. This is a great way to know how popular your site is, as an alternative to the classic pageviews metric.

The Dashboard home shows another pretty important metric called the viewing time. It is the total aggregate time your users spend viewing the pages of your website in a month. As always, we only count the time when a page is actually visible and not when it is in the background or minimized.

Give Now4real a try! You will be surprised by how pleasantly spicy your website will become…

Add Now4real to your site now

It's easy. It's free.

Enable your visitors to chat with each other. Let them find out the most popular pages.
Spark up instant communities on your website!

© 2024 Now4real Srl. All rights reserved. P.IVA IT10328990964. Illustrations by Freepik Storyset